1.1 Overview of AeroPress and Its Benefits
The AeroPress is a versatile coffee maker beloved by enthusiasts worldwide. Its durability and portability make it ideal for manual brewing, delivering smooth, full-bodied coffee and espresso-style shots effortlessly.
1.1 Overview of AeroPress and Its Benefits
The AeroPress is a portable and durable coffee maker designed for manual brewing. It combines air pressure and immersion to produce smooth, full-bodied coffee and espresso-style shots. Its compact design makes it ideal for travel, while the quick cleanup and versatility in brewing methods (hot or cold) enhance its appeal. The AeroPress is praised for its ability to minimize bitterness and bring out the coffee’s natural flavors, making it a favorite among both beginners and coffee enthusiasts seeking a manual brewing experience.
1.2 Why AeroPress is Popular Among Coffee Enthusiasts
The AeroPress is popular among coffee enthusiasts due to its versatility, ease of use, and portability. It allows users to experiment with various brewing methods, from espresso-style shots to cold brew, making it a versatile tool for coffee lovers. The device is also praised for its ability to produce smooth, full-bodied coffee with minimal bitterness. Its compact design and ease of cleaning further enhance its appeal, making it a favorite for both home use and travel. This adaptability and consistency have solidified its reputation as a must-have for coffee enthusiasts.

Standard Brewing Method
The standard AeroPress brewing method is a straightforward process that involves adding coffee grounds, hot water, and pressing gently to extract a smooth, full-bodied flavor. Perfect for beginners and coffee enthusiasts alike, it ensures consistent results every time.
2.1 Materials Needed for Brewing
To brew with the AeroPress, you’ll need the AeroPress chamber, plunger, filter cap, and paper filters; Additionally, a sturdy mug, coffee grinder, scale, water kettle, timer, and spoon are essential. Ensure the water is heated to the optimal temperature (around 175°F) for extraction. A medium-fine grind is recommended for the best results. These tools and materials will help you achieve a perfect brew every time, whether you’re making coffee or espresso.
2.2 Step-by-Step Guide to Brewing Coffee
- Measure and grind 17-21 grams of medium-fine coffee beans.
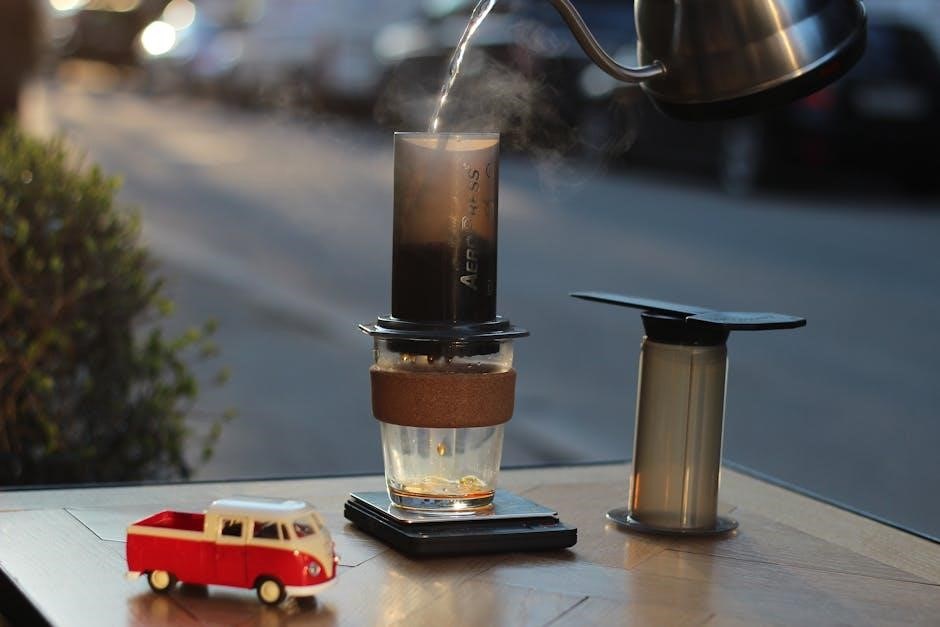
- Heat water to 175°F and assemble the AeroPress with a paper filter.
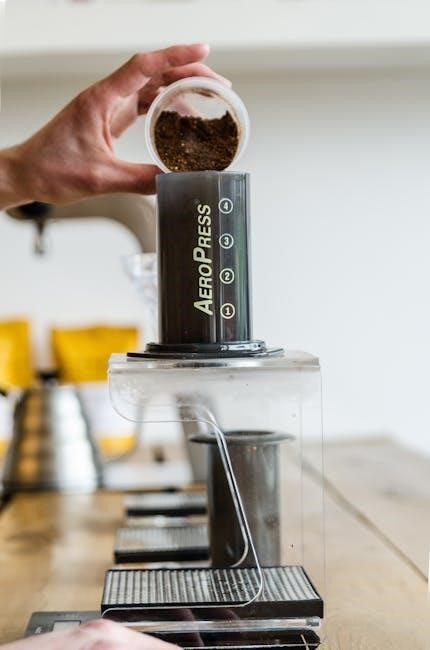
- Pour the grounds into the chamber, ensuring an even layer.
- Add hot water, stir gently, and let it steep for 1-2 minutes.
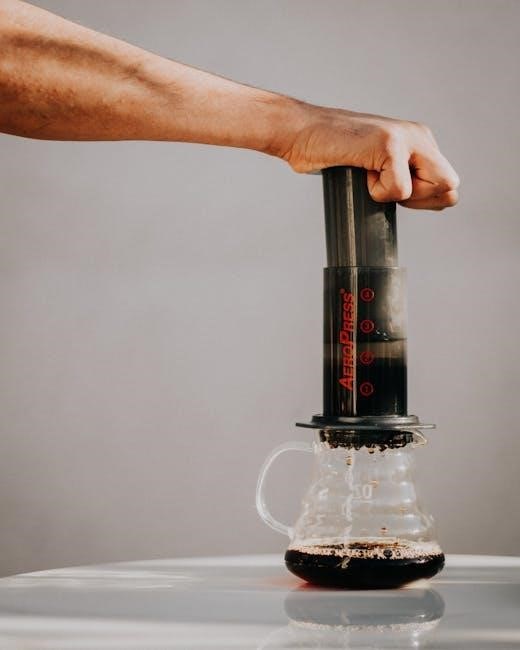
- Slowly press the plunger for 30-45 seconds until resistance is felt.
- Serve the smooth, full-bodied coffee immediately and enjoy.
2.3 Tips for Achieving the Perfect Brew
- Use a medium-fine coffee grind for optimal extraction.
- Heat water to 175°F for ideal brewing temperature.
- Steep for 1-2 minutes to avoid under or over-extraction.
- Press slowly and evenly to ensure a smooth, full-bodied flavor.
- Experiment with coffee-to-water ratios to suit your taste preferences.
- Always use fresh, filtered water and clean the AeroPress thoroughly after use.

Advanced Brewing Techniques
The AeroPress offers creative brewing methods, enabling users to experiment with unique techniques and customize flavors, making it a favorite among coffee enthusiasts for advanced brewing.
3.1 Inverted Brewing Method
The inverted method involves brewing with the AeroPress flipped upside down. Add coffee grounds to the chamber, pour hot water, and let it steep. After stirring, attach the plunger and slowly press. This technique allows for better saturation and extraction, resulting in a smoother, more balanced flavor. Many enthusiasts prefer this method for its flexibility and ability to customize brew strength and flavor profile. Proper technique ensures a perfect cup every time, making it a favorite among advanced users.
3.2 Making Espresso and Cold Brew with AeroPress
The AeroPress excels at crafting espresso and cold brew. For espresso, use a fine grind, heat water to 175°F, and press gently for 30 seconds. This yields a rich, creamy shot. For cold brew, steep coarse grounds in cold water for 12–24 hours. The AeroPress’s design allows for smooth extraction, producing a flavorful, low-acidity cold brew. These methods highlight the device’s versatility, enabling users to explore various coffee styles with ease and precision. Its portability and simplicity make it ideal for both espresso and cold brew enthusiasts alike.
3.3 Customizing Your Brew Strength and Flavor
Customizing your AeroPress brew is effortless. Adjust grind size, steeping time, and water temperature to tailor strength and flavor. Finer grinds yield bolder flavors, while coarser grinds produce lighter notes. Steeping time can range from 1–4 minutes, with longer times increasing strength. Water temperature, ideally between 160°F–180°F, impacts extraction. Experiment with coffee-to-water ratios to balance acidity and body. The AeroPress’s manual process allows precise control, enabling you to craft brews that suit your taste preferences perfectly.
Cleaning and Maintenance
Regularly rinse the AeroPress with fresh water after use. Store it with the plunger fully extended to prevent mold. Replace the rubber seal periodically for optimal performance.
4.1 Proper Cleaning After Each Use
After brewing, rinse the AeroPress under fresh water to remove residual coffee oils. Push the plunger to eject the used coffee grounds into the trash. For tougher residue, hand wash with mild soap and warm water. Avoid using abrasive cleaners or dishwashers, as they can damage the AeroPress. Dry thoroughly, especially the rubber seal, to prevent mold. Store the AeroPress with the plunger fully extended to ensure the seal isn’t compressed, maintaining its longevity and performance.
4.2 Storing the AeroPress Correctly
Store the AeroPress with the plunger fully extended to avoid compressing the rubber seal, which can cause it to stretch or lose shape. Place it in a dry, cool environment, such as a cupboard or drawer. For added convenience, the AeroPress Go model includes a travel-friendly kit that allows you to store the maker in its accompanying mug. Avoid leaving the AeroPress in direct sunlight or extreme temperatures, as this may affect its durability. Proper storage ensures the AeroPress remains in optimal condition for future use.
4.3 Replacing the Seal and Other Parts
Regularly inspect the AeroPress seal for wear or looseness. If damaged, replace it to maintain proper function. To order a replacement seal, visit the official AeroPress website or authorized retailers. Other parts, like the filter cap or plunger, can also be replaced if damaged. Proper maintenance ensures longevity and optimal performance. Replace parts promptly to avoid leakage or brewing issues. Always use genuine AeroPress components for reliability. This simple process keeps your AeroPress in great working condition, allowing you to enjoy perfect brews every time.
Safety Precautions
Always ensure the rubber seal is secure before pressing to avoid hot water ejection. Use a sturdy mug and press gently to prevent breakage or spills.
Never place the AeroPress in a dishwasher, as it may damage the components. Proper handling ensures safe and enjoyable brewing experiences every time.
5.1 Avoiding Common Mistakes
To ensure safe and effective use of the AeroPress, avoid common mistakes such as pressing too forcefully, which can lead to breakage or spills. Always check that the rubber seal is secure before brewing to prevent hot water from escaping. Never press into fragile or narrow cups, as this increases the risk of damage. Additionally, avoid using the inverted method, as it is not recommended and may result in uneven extraction or accidents. Proper handling and adherence to guidelines are key to a safe and enjoyable brewing experience.
5.2 Preventing Breakage and Spills
To prevent breakage and spills, always use a sturdy mug and ensure the AeroPress is placed securely on a flat surface. Avoid pressing too forcefully, as this can cause the device to break or spill hot water. Ensure the rubber seal is tightly in place before brewing to prevent leaks. Never press into narrow or fragile cups, and always rinse the AeroPress thoroughly after use to avoid clogging. Proper handling and storage will extend the lifespan of your AeroPress.

AeroPress Accessories
The AeroPress filters ensure smooth extraction, while the AeroPress Go Kit offers portability. Additional accessories like replacement seals and plungers enhance durability and convenience for coffee enthusiasts.
6.1 Filters and Their Importance
AeroPress filters are essential for smooth coffee extraction. They prevent coffee grounds from entering the brew, ensuring a clean and flavorful cup. The official AeroPress filters are designed to optimize extraction and prevent clogging. Users can choose between paper and metal filters, each offering distinct flavor profiles. Regularly replacing filters maintains the device’s performance and hygiene. The AeroPress Go Kit includes a compact filter storage, making it convenient for travel. Proper filter maintenance ensures consistent brewing results and extends the lifespan of the AeroPress.
6.2 Travel-Friendly AeroPress Go Kit
The AeroPress Go Kit is a portable, travel-friendly version of the original AeroPress. It includes a compact coffee maker, a mug, and a lid, all designed to fit neatly inside the mug for easy transport. Perfect for camping, travel, or office use, the AeroPress Go allows you to brew 1-3 cups of coffee, espresso, or cold brew anywhere. Its lightweight and durable design, along with a carrying case, makes it an ideal companion for coffee lovers on the move. This kit ensures you never compromise on coffee quality, no matter where you are.
Troubleshooting Common Issues
Address common problems like a loose rubber seal or bitter/weak coffee by adjusting grind size, brew time, or water temperature. Replace worn seals for optimal performance.
7.1 Dealing with a Loose Rubber Seal
If the rubber seal on your AeroPress is loose, it can lead to improper brewing and potential messes. To fix this, ensure the seal is fully compressed during storage. If the issue persists, rinse the seal under warm water to remove any coffee oils. For severe cases, replacing the seal is recommended. Contact the manufacturer or visit their official website to order a replacement. Proper maintenance and regular cleaning can prevent the seal from loosening over time.

7.2 Fixing Bitter or Weak Coffee
If your AeroPress coffee tastes bitter, it may be due to over-extraction from a fine grind or prolonged brewing time. Try a coarser grind or shorter steeping time. For weak coffee, adjust by using a finer grind or extending the brew time slightly. Ensure water temperature is between 175°F and 195°F for optimal extraction. Experimenting with these variables can help achieve a balanced flavor. Regular cleaning and proper technique also play a role in preventing inconsistent results.
PDF Resources and Guides
Access official AeroPress manuals and guides for detailed instructions. Download the PDF to explore brewing techniques, troubleshooting, and maintenance tips for optimal coffee-making experiences.
8.1 Downloading the Official AeroPress Manual
The official AeroPress manual is readily available as a downloadable PDF from the AeroPress website and platforms like ManualsLib. This comprehensive guide provides step-by-step instructions, illustrated diagrams, and troubleshooting tips to help users master brewing techniques. It also covers maintenance advice and detailed brewing methods, ensuring optimal performance. Whether you’re a beginner or an advanced user, the manual offers clear guidance to enhance your coffee-making experience. Access it easily to explore the full potential of your AeroPress coffee maker;
8.2 Illustrated Instructions for Easy Learning
The official AeroPress PDF guide includes illustrated instructions that simplify the learning process. These visuals provide a clear, step-by-step breakdown of brewing techniques, making it easy for users of all skill levels to follow. The diagrams cover everything from assembling the AeroPress to pressing the perfect shot. This visual approach ensures that even those who prefer not to read lengthy text can understand the process. The illustrated guide is particularly helpful for beginners, offering a user-friendly way to master AeroPress brewing.