Safety Precautions Before Setting Up the 10×30 Canopy Tent
Always ensure at least two people are present for setup to avoid accidents. Allocate several hours for installation and carefully review instructions beforehand. Ensure all tools and parts are ready to minimize risks and delays during assembly.
1.1. Essential Safety Tips for Tent Installation
Ensure at least two people are present to avoid accidents during setup. Allocate several hours for installation and carefully review instructions beforehand. Check weather conditions and avoid setup in strong winds or rain. Clear the area of debris and ensure the ground is level. Wear gloves and proper footwear for protection. Follow manufacturer guidelines for weight limits and structural integrity. Secure the tent firmly to prevent collapse and ensure all parts are tightly fastened. Keep children and pets away during assembly to minimize distractions and risks.
1.2. Weather Conditions to Avoid During Setup
Avoid setting up the 10×30 canopy tent in strong winds, as this can destabilize the structure. Rain or wet conditions can make the ground slippery and compromise the tent’s stability. Do not assemble the tent during thunderstorms, as lightning poses a significant risk. High humidity or extreme heat can affect the tent’s fabric and frame. Ensure the area is clear of standing water or mud. Ideal setup conditions include light winds, clear skies, or overcast weather without rain. Always check the weather forecast before starting the installation process.

Tools and Materials Needed for Assembly
Essential tools include sturdy stakes, ropes, a rubber mallet, and a ladder. Ensure all hardware like bolts and screws is included. Have spare parts available. Bring measuring tape and gloves for efficient setup. Refer to the instruction manual for specific requirements. At least two people are needed for safe assembly.
2.1. List of Required Tools and Hardware
To assemble the 10×30 canopy tent, you will need sturdy stakes, durable ropes, sandbags for added stability, a rubber mallet to secure the stakes, and a ladder for reaching high areas. Essential hardware includes bolts, screws, sidewalk hooks, and spring clips for attaching sidewalls. Ensure all parts are included and have spare components on hand. Wear gloves for better grip and protection. A measuring tape can help verify the setup area. Refer to the instruction manual for specific proper tools and hardware requirements to ensure a safe and efficient assembly process.
2.2. Importance of Having Spare Parts
Having spare parts is crucial to ensure a smooth setup process for your 10×30 canopy tent. Spare stakes, ropes, and connectors can prevent delays if any components break or go missing. Extra bolts and screws are essential for securing the frame and sidewalls. Sandbags or weights should also be available for added stability. Keeping spare parts on hand allows for quick repairs and ensures the tent remains stable, especially in windy conditions. This preparation minimizes the risk of having to pause assembly and ensures your event proceeds without interruptions or safety hazards.
Choosing the Right Location for the Tent
Select a flat, even surface for the 10×30 canopy tent, ensuring adequate space for its 30-foot length and 10-foot width. Avoid uneven or rocky ground to prevent instability. The area should be clear of obstructions like trees or power lines. Choose a spot with good drainage to avoid water pooling during rain. Ensure the location is easily accessible for unloading and setup. Proper site selection ensures safety, stability, and a successful event setup.
3.1. Evaluating the Ground and Terrain
Evaluate the ground carefully to ensure it is flat and even, avoiding uneven or rocky surfaces that could destabilize the tent. Check for obstructions like trees, power lines, or underground utilities. Ensure the area is clear of debris and vegetation that could interfere with setup or safety. Proper drainage is crucial to prevent water pooling during rain. Assess the terrain for soft spots or areas prone to sinking, which may require additional support. A well-evaluated site ensures the tent’s stability and safety, preventing potential issues during assembly and use.
3.2. Ensuring Adequate Space and Clearance
Ensure the setup area is at least 10×30 feet to accommodate the tent’s footprint. Verify there are no overhead obstructions, such as branches or power lines, and maintain a 3-foot clearance around the tent for safe assembly and movement. Avoid placing the tent near flammable materials or obstacles that could hinder proper staking. Choose a location with enough space for the tent’s entry and exit points, as well as room for sidewalls to be fully extended. Proper spacing ensures the tent is secure, functional, and safe for use.

Step-by-Step Instructions for Setting Up the Tent
Begin by unpacking and organizing all components. Assemble the frame and poles, then attach the canopy and sidewalls. Finally, secure the tent with stakes and ropes to ensure stability and safety.
4.1. Unpacking and Organizing the Tent Components
Start by carefully unpacking the tent from its storage bag. Lay out all components, including poles, stakes, ropes, and the canopy, on a flat surface. Inspect each part for damage or missing items. Organize the pieces into categories, such as frame sections, connectors, and fabric components, to streamline the assembly process. Ensure all tools, like wrenches and hammers, are within reach. Assign tasks to helpers to maintain efficiency and safety during setup. Double-check the instruction manual to confirm all parts are accounted for before proceeding.
4.2. Assembling the Frame and Poles
Begin by assembling the tent’s frame, starting with the central hub. Attach the leg poles to the hub, ensuring they are securely connected. Next, extend the roof poles and connect them to the top of the hub, forming the tent’s structure. Tighten all connections firmly using the provided tools. Once the frame is upright, attach the side poles to the legs and roof for added stability. Ensure the frame is evenly balanced and sturdy before moving on to the next step. Always work with at least two people to handle the weight and complexity of the frame assembly.

4.3. Attaching the Canopy and Sidewalls
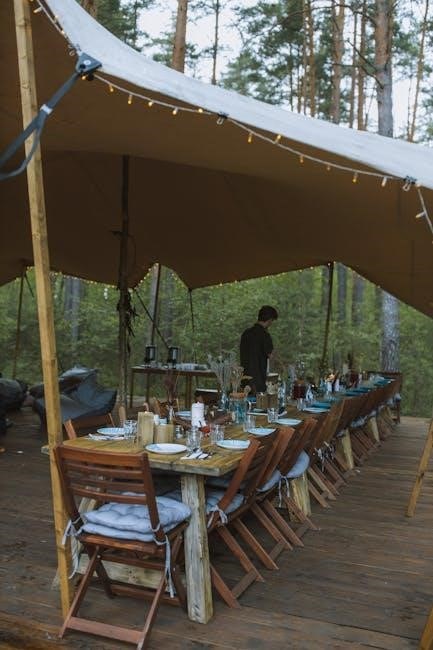
Once the frame is assembled, lay the canopy over the top, ensuring it is centered and evenly spread. Secure the canopy to the frame using Velcro straps or clips located on the edges. Tighten all connections to create a taut surface. Next, attach the sidewalls by aligning their hooks or loops with the frame’s designated points. Start with one side, ensuring a snug fit, then move to the others, maintaining alignment. For removable sidewalls, simply clip or hook them into place. Check all attachments for security and adjust as needed to ensure a stable and weather-tight structure.
4.4. Securing the Tent with Stakes and Ropes
Drive stakes into the ground at each corner of the tent, ensuring they are angled away to maximize stability. Tighten the ropes around the frame, securing them to the stakes firmly. Use additional ropes to tie off the top and sides, ensuring the canopy remains taut. For added stability, place sandbags or weights on the frame’s base. Double-check all connections to ensure the tent is secure and can withstand wind or weather conditions. Regularly inspect the stakes and ropes during the event to maintain structural integrity.

Additional Features and Customizations
Add windows and vents for ventilation. Install lighting and decorations for enhanced ambiance. Customize with removable sidewalls and UV protection for tailored events.
5.1. Adding Windows and Vents for Ventilation
Adding windows and vents to your 10×30 canopy tent enhances airflow and reduces heat buildup. Install removable window panels for natural light and visibility. Vents at the roof peaks improve air circulation, preventing condensation and ensuring a comfortable environment. These features are especially important for extended events or in warmer climates. Proper ventilation helps maintain a fresh atmosphere, making your gathering more enjoyable for guests; Ensure all windows and vents are securely attached to uphold the tent’s structural integrity and weather resistance.
5.2. Installing Lighting and Decorations
Enhance your 10×30 canopy tent with lighting and decorations for a memorable event. String lights or fairy lights can be hung from the frame for ambiance. Use weather-resistant lights to ensure safety and durability. Decorations like drapes, banners, or flowers can be attached to sidewalls or the tent’s structure. Ensure all items are securely fastened to prevent damage from wind. Choose themes that match your event style, such as wedding decor or party themes. Always follow manufacturer guidelines for adding decorations to maintain the tent’s stability and warranty conditions.

Anchoring and Stabilizing the Tent

Secure the 10×30 canopy tent using sandbags or weights to prevent shifting. Use sturdy stakes and ropes to anchor the tent firmly to the ground. For windy conditions, reinforce the structure with additional support and ensure all tie-downs are tightly secured. This ensures stability and safety during events.
6.1. Using Sandbags and Weights for Stability
For optimal stability, place sandbags or weights on the tent’s legs and roof frame. This prevents the structure from shifting in wind or rain. Ensure weights are evenly distributed across all corners to maintain balance. Secure sandbags tightly to the base of each leg, and use heavy-duty weights for added protection. Regularly inspect the setup to ensure all components are firmly in place. This method is particularly effective for outdoor events on uneven or windy terrain, ensuring the tent remains secure and safe throughout your gathering.
6.2. Reinforcing the Structure for Windy Conditions
To reinforce the tent in windy conditions, use additional stakes and ropes to secure the frame tightly to the ground. Tighten all connections and bolts to ensure the structure is rigid. Install extra support poles if available, especially around the roof and corners. Angle the tent to face away from prevailing winds to reduce pressure. Cover loose fabric areas to prevent flapping, which can cause stress on the frame. Regularly monitor the tent’s stability during windy weather to make adjustments as needed for safety and durability.

Maintenance and Storage Tips
Clean the tent with mild soap and water, removing dirt and stains. Allow it to dry completely to prevent mold and mildew before storage.
7.1. Cleaning and Drying the Tent After Use
After each use, clean the tent with mild soap and water to remove dirt and stains. Avoid harsh chemicals or abrasive materials that may damage the fabric. For tough spots, gently scrub with a soft brush before rinsing thoroughly. Ensure the tent is completely dry before storage to prevent mold and mildew. Allow it to air dry in a well-ventilated area, preferably in the sun. Check for any manufacturer-specific cleaning instructions to maintain the tent’s waterproof coating and extend its lifespan.
7.2. Proper Storage to Extend Lifespan
Store the tent in a cool, dry place, away from direct sunlight and moisture. Use the original storage bag or a durable, breathable container to protect the tent. Ensure all parts, including poles and stakes, are neatly organized and securely packed. Avoid folding or creasing the fabric excessively, as this may cause permanent damage. Check the tent for any signs of wear or pests before storage. Store in a temperature-stable environment, avoiding extreme heat or cold. Always follow the manufacturer’s guidelines for storage to maintain the tent’s condition and longevity.